Cash Flow
The Cash Flow tab will help you track your recurring cash events and prepare for upcoming expenses.
- Cash flow
- Cash events
- Calendar view
The Cash Flow tab combs through your transactions to help you understand your historical spending and predict future spending. It allows you to easily identify upcoming recurring bills and payments, as well as one-time or annual payments such as property tax. It helps you see the impact of upcoming payments and plan ahead.
Setting Up the Tool
When you first open the Cash Flow tab, you'll see an explanation of the tool. Click through this until you see the button prompting you to ‘Get Started’.
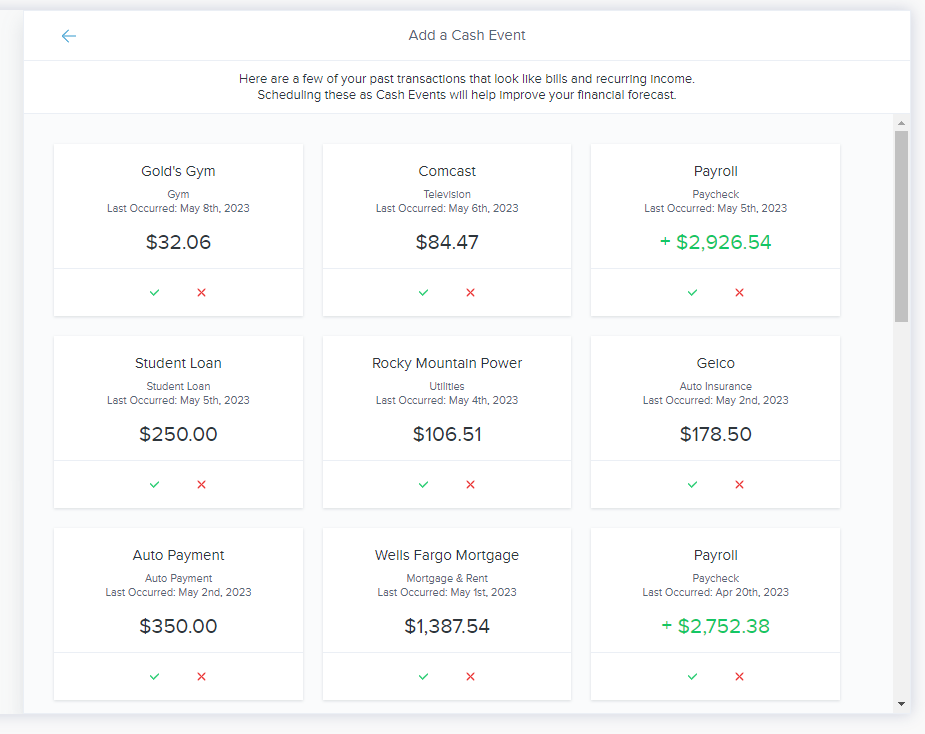
Next, you’ll be presented with a list of past recurring transactions or ‘Cash Events’. Add any of these cash events to your Cash Flow graph by clicking on the green checkmark underneath the transaction. Be sure to add recurring payments as well as income, such as your paycheck or regular dividends.
When you’re finished adding events, you’ll be able to see your currently available cash based on all asset accounts, as well as an estimate of your future available balance.
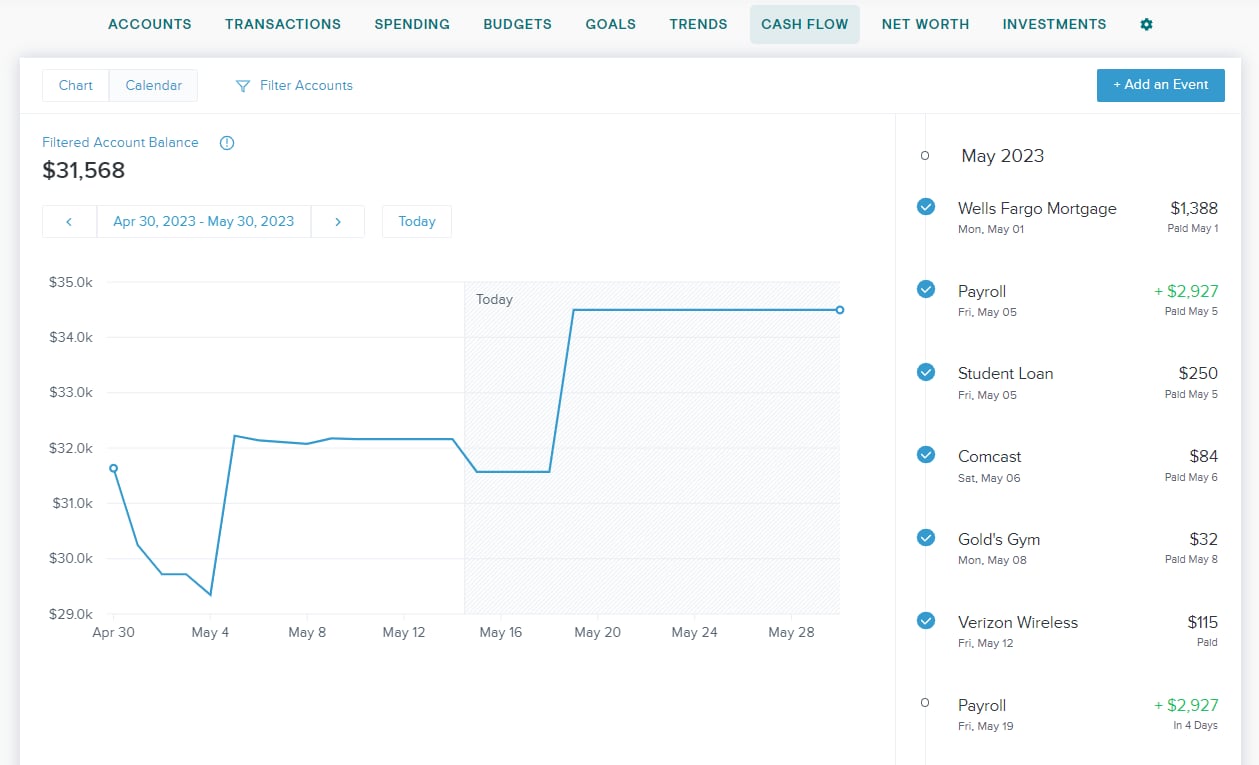
The main screen provides a graph forecasting the cash you are expected to have available on a given date within the selected range. It includes all checking and savings accounts by default, but you are able to change this using the button labeled ‘Filter Accounts’ at the top of the graph.
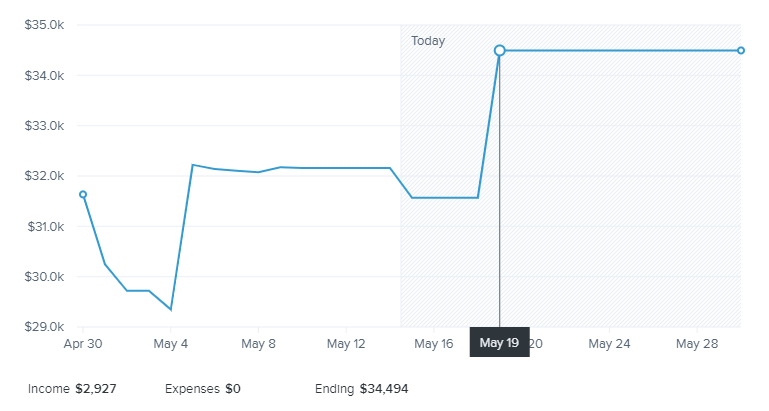
Hover over any point on the graph to see the income, expenses, and the ending balance for a particular day. Days in the past show your actual daily balance.
Date Range
The graph will show one month at a time, but you are able to scroll one month back and one month forward using the arrows at the top of the graph.
Cash events are recurring or one-time events that will be represented in your Cash Flow forecast. These events are tracked in the Cash Flow tab, but they won't directly affect your account balances. Events can be income or expenses.
A list of tax events for the month will appear on the right side of the graph. Paid events will have check marks and overdue events will have a red exclamation mark.
Add a new Cash Event
To add a Cash Event, click on “Add an Event” in the top right corner.
The software will suggest recurring events or you can scroll to the bottom to ‘Create Your Own’. You can choose to create an event based on a past transactions or create an event from scratch. If you choose to start from scratch, you will be prompted to enter:
- Payee - who the transaction was paid to or from
- Average Amount – the amount of the transaction
- Type – whether the money was debited (taken from) or credited (added to) the account
- Account – the account that the transaction is associated with
- Frequency – on which day and how often this transaction takes place
- Category (optional) – the budget category that the transaction falls into
Edit a Cash Event
To edit an event click on the event from the list on the right. Click '•••' and choose 'Edit’. Click ‘Save’ in the bottom right corner to finalize your changes.
To mark the event as unpaid, click '•••' and choose 'Undo Mark as Paid'.
Delete a Cash Event
To delete an event, select it and click '•••' and choose ‘Delete’. Select whether you'd like to delete all future events of this type or the whole series (all past and future events of this type).
Mark as Paid
The software will automatically match transactions to Cash Events when it is able, but you may sometimes need to do this manually.
To manually mark an event as paid:
- Select the the appropriate cash event from the list on the right.
- Press the "Mark as Paid" button.
- If you know what transaction represents this payment, choose "Link to Transaction" to bring up a list of recent transactions.
- Select the appropriate transaction.
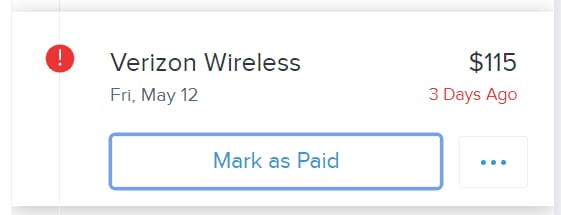
By linking transactions, you will improve forecasting over time.
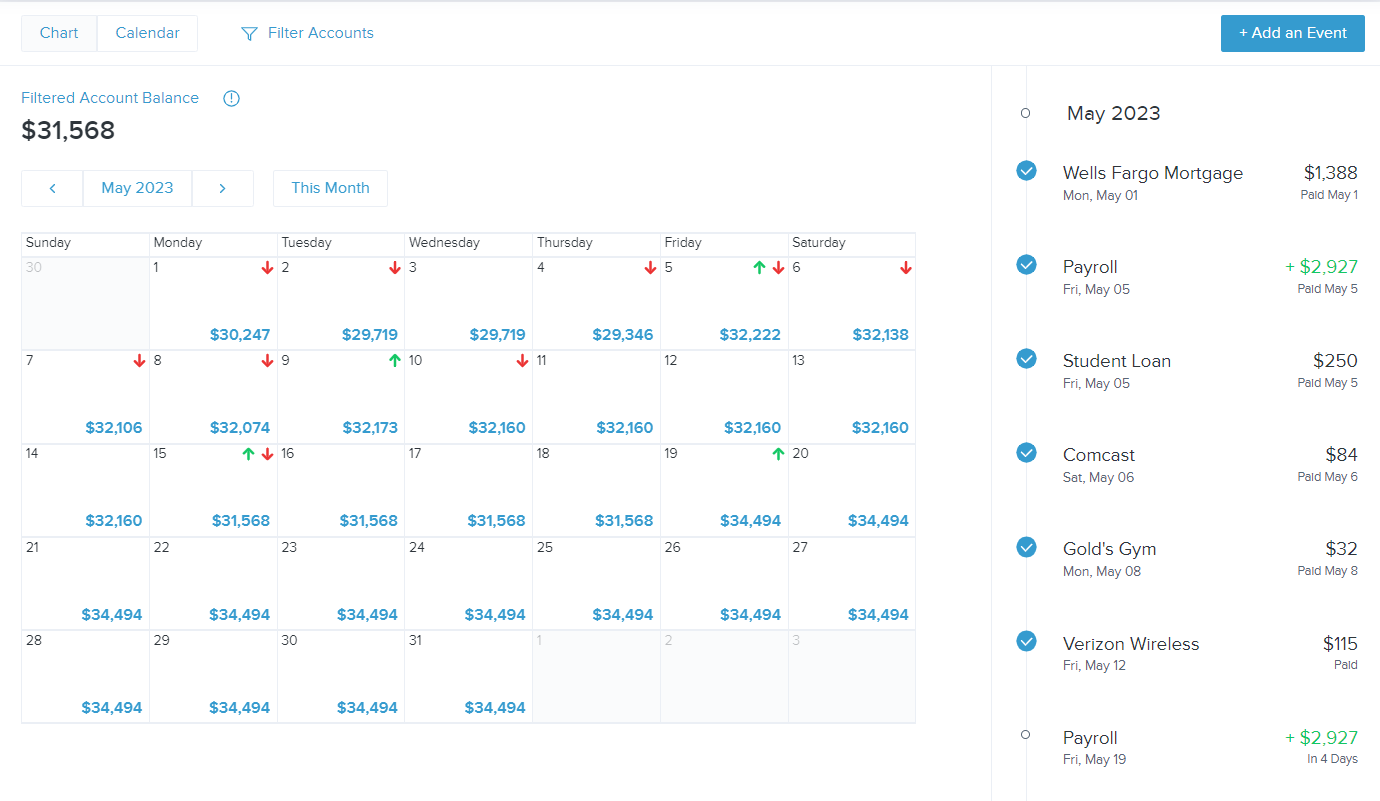
In the top left corner of the Cash Flow tab, you are able to switch to ‘Calendar View’. Cash events will be shown on the calendar using a red down arrow to represent expenses and a green up arrow to represent income.
